
Image shot during the 2020 Lyrid Meteor Shower
Shot with a Canon 6d and Tamron SP 15-30mm f/2.8 Di VC USD
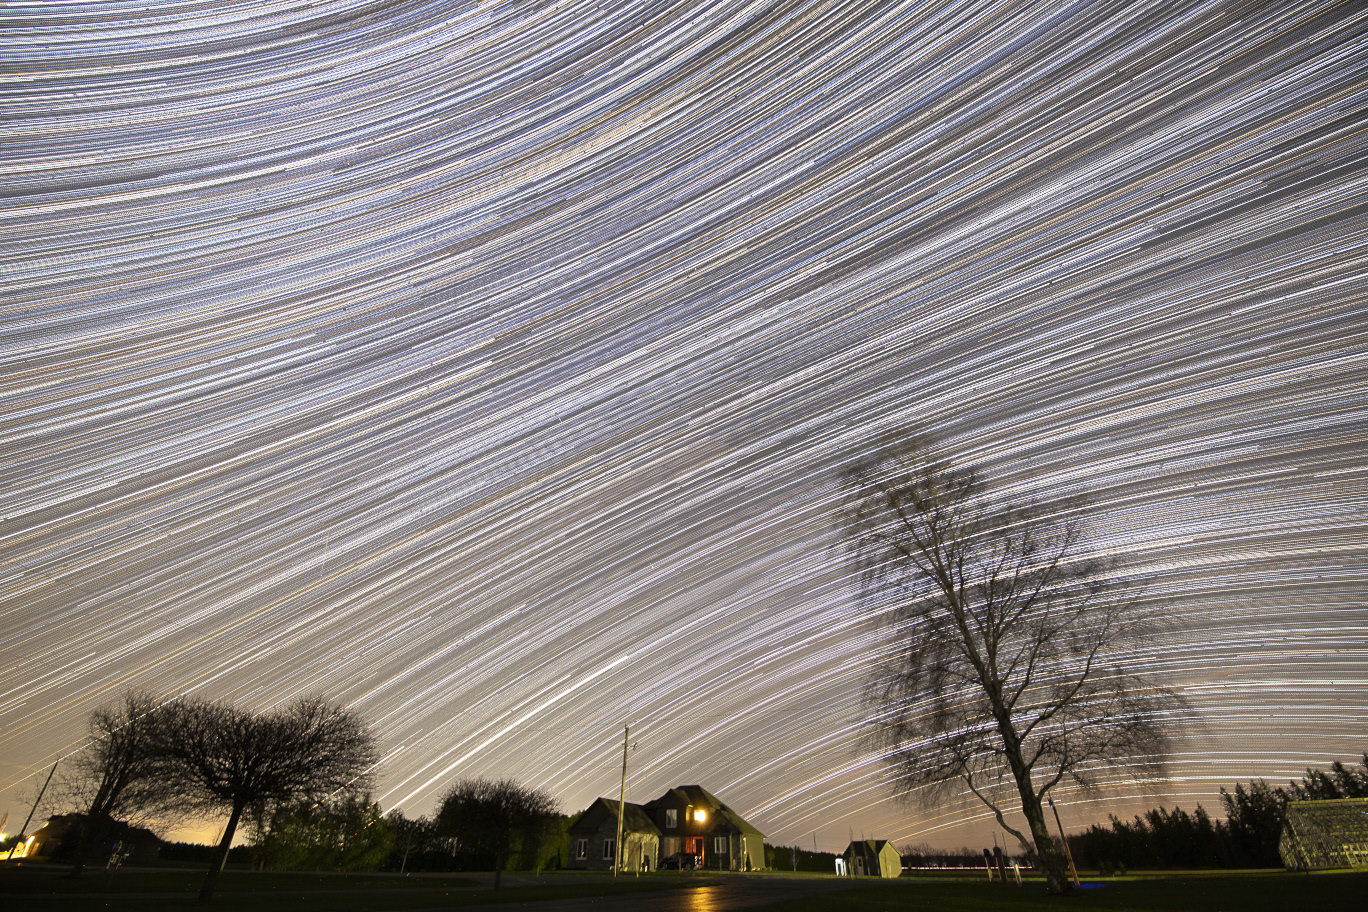
I thought the next natural progression in our learning curve would be to shoot some star trails. This is something that I don't do often myself but I figured I could help you get started.
Things that we have to remember even before we head out to shoot at night and in the elements, is to PLAN!!
DO NOT go out without a plan in mind. This is the quickest way to failure and to a potentially dangerous situation. First and foremost is your safety.
If you are in North America you can first visit the Dark Sky Charts site http://www.cleardarksky.com/csk/ This site is a forecast (not always 100% accurate, but close). This will probably give you the best opportunity for success when it comes to having stars to shoot.
Pre-scout a location and set up when it’s still light enough to see. Doing this is both good for setting up a foreground interest, and for your safety. I’d hate for anyone to injure themselves by stepping into a rut or hole that they can’t see due to the darkness.
Consider the weather. It might even be a good idea to pack a lawn chair and few blankets to aid in keeping warm. I’ve always found that the more layers of clothing that you are wearing, the warmer you will be. The other thing I’ve noted over the years is that it’s a lot easier to take off clothing because you are too warm, than it is to stay warm with too little clothing!!!
Now, you have a location in mind that is away from the bright lights of the city, you have yourself some nice warm clothes and possibly blankets, some hot coffee (or hot chocolate) you are ready to begin.
There are a few other things that I didn’t mention that you will obviously need, a good tripod, your camera (capable of shooting in either bulb mode with a cable release or for 30 seconds or so), fresh batteries (or a few sets) and an empty, large memory card to store the individual shots that we will put together.
I should mention a bit more about location. You can’t really drive far enough away from city lights, over long exposures with the ISO cranked up on your camera you’d be surprised at how much light will show up. You can shoot star trails with light pollution, but more stars will show up, and the background sky will look far better the further away from light pollution you can get.
Ok, now that you’ve found a nice dark location you can set up your camera and tripod. I’d suggest focusing on your foreground interest while you still have some light, it gets quite difficult to focus a camera in the dark. Make sure once you’ve focused the camera on the foreground subject that you put the camera in Manual Focus mode or it could possibly (depending on your settings) try to focus if you choose to do multiple exposures and stack them.
Once you are ready to go and the skies have darkened, try a test shot or two. The reason for doing this is twofold, one, you can make sure the shot looks like you want it too, and secondly, you can adjust the white balance to suit your particular preference.
Again this next portion is up to you. You can choose to either use a single shot or stack multiple shots. Single shots will have shorter star trails and stacking will get you that long star trail look.
If you are using a single shot, I wouldn’t suggest using a high ISO as you will get more noise in the shot. It’s a bit of a trade off because you’ll also get fewer stars in your shot. This is where you will have to experiment to see what works best for you and your camera. Another thing to remember when using a single shot is that the longer your focal length, the longer the star trails will be in any given exposure.
If you’re choosing to stack I’d suggest using a free program called *StarStaX*, it works with Mac OSX, Windows, and Linux so everyone should be good to go with stacking. Here is where you can get the program https://markus-enzweiler.de/software/
When stacking I’d personally resist the urge to use your lens wide open. Most lenses get “Soft” and are more prone to chromatic aberration when wide open, set it one or two stops away from wide open, you’ll still get some good results. For stacking you can also bump the ISO up a bit, but make sure to not make the image noisy. For example, my old entry level DSLR had horrible noise levels at anything higher than 400 ISO, my new camera can go up to 1600-3200 before the noise is too much for my liking.
*Turn off your high ISO and Long exposure noise reduction in the camera, it will take too long to write the image* (more on this later)
If you have the use of a laptop and power source you can even control your DSLR from the laptop. There are programs for most DSLRs that will allow you to shoot continuously and store the shots on your computer. Some programs allow you to shoot longer than 30 seconds while others don’t. There are both free and paid versions of these types of programs.
So again, the keys for stacking are long exposures (30+ seconds)
few stops away from a wide open aperture
Higher ISO
30+ second exposures one right after the other.
Use a computer, cable release, or the settings on your camera (if it allows) to take continuous shots.
Take a couple practice shots to see if anything is too bright (foreground interest) for your liking. If your foreground interest is going to be too dark you can use a flashlight to “paint” the foreground interest in your first couple shots. This way it won’t be just a silhouette in your image. (you might want to practice doing this before attempting during a star trail shot) also do it in the beginning of the sequence and another at the very end. If you mess up you can exclude them and it won’t leave a gap in your star trails.
The last thing to mention is after you’ve taken all of your images, put the lens cap back on and take a few shots of the same length with the cap on. This is called taking a dark frame. The reason you do this is to help eliminate noise in the shots. The key to dark frames is to take them at the same settings and temperature that the images were taken at. The reason for telling you this is that some of the programs out there for stacking allow you to use dark frames to help reduce noise. I’ll explain this better in the next little while.
If there are any questions you can post them here or in my blog.
Enjoy
Darryl
Thank you!