
Photographing Meteor Showers - From Planning to Post Processing
Before beginning I will state that moving beyond this point is done so at your own risk. I will not, and can not be held responsible for injury or damage to your equipment, your person, or a third party. You are hopefully a responsible person and can make decisions based upon your own experience. I never would endorse an illegal activity or one that would put someone at risk.
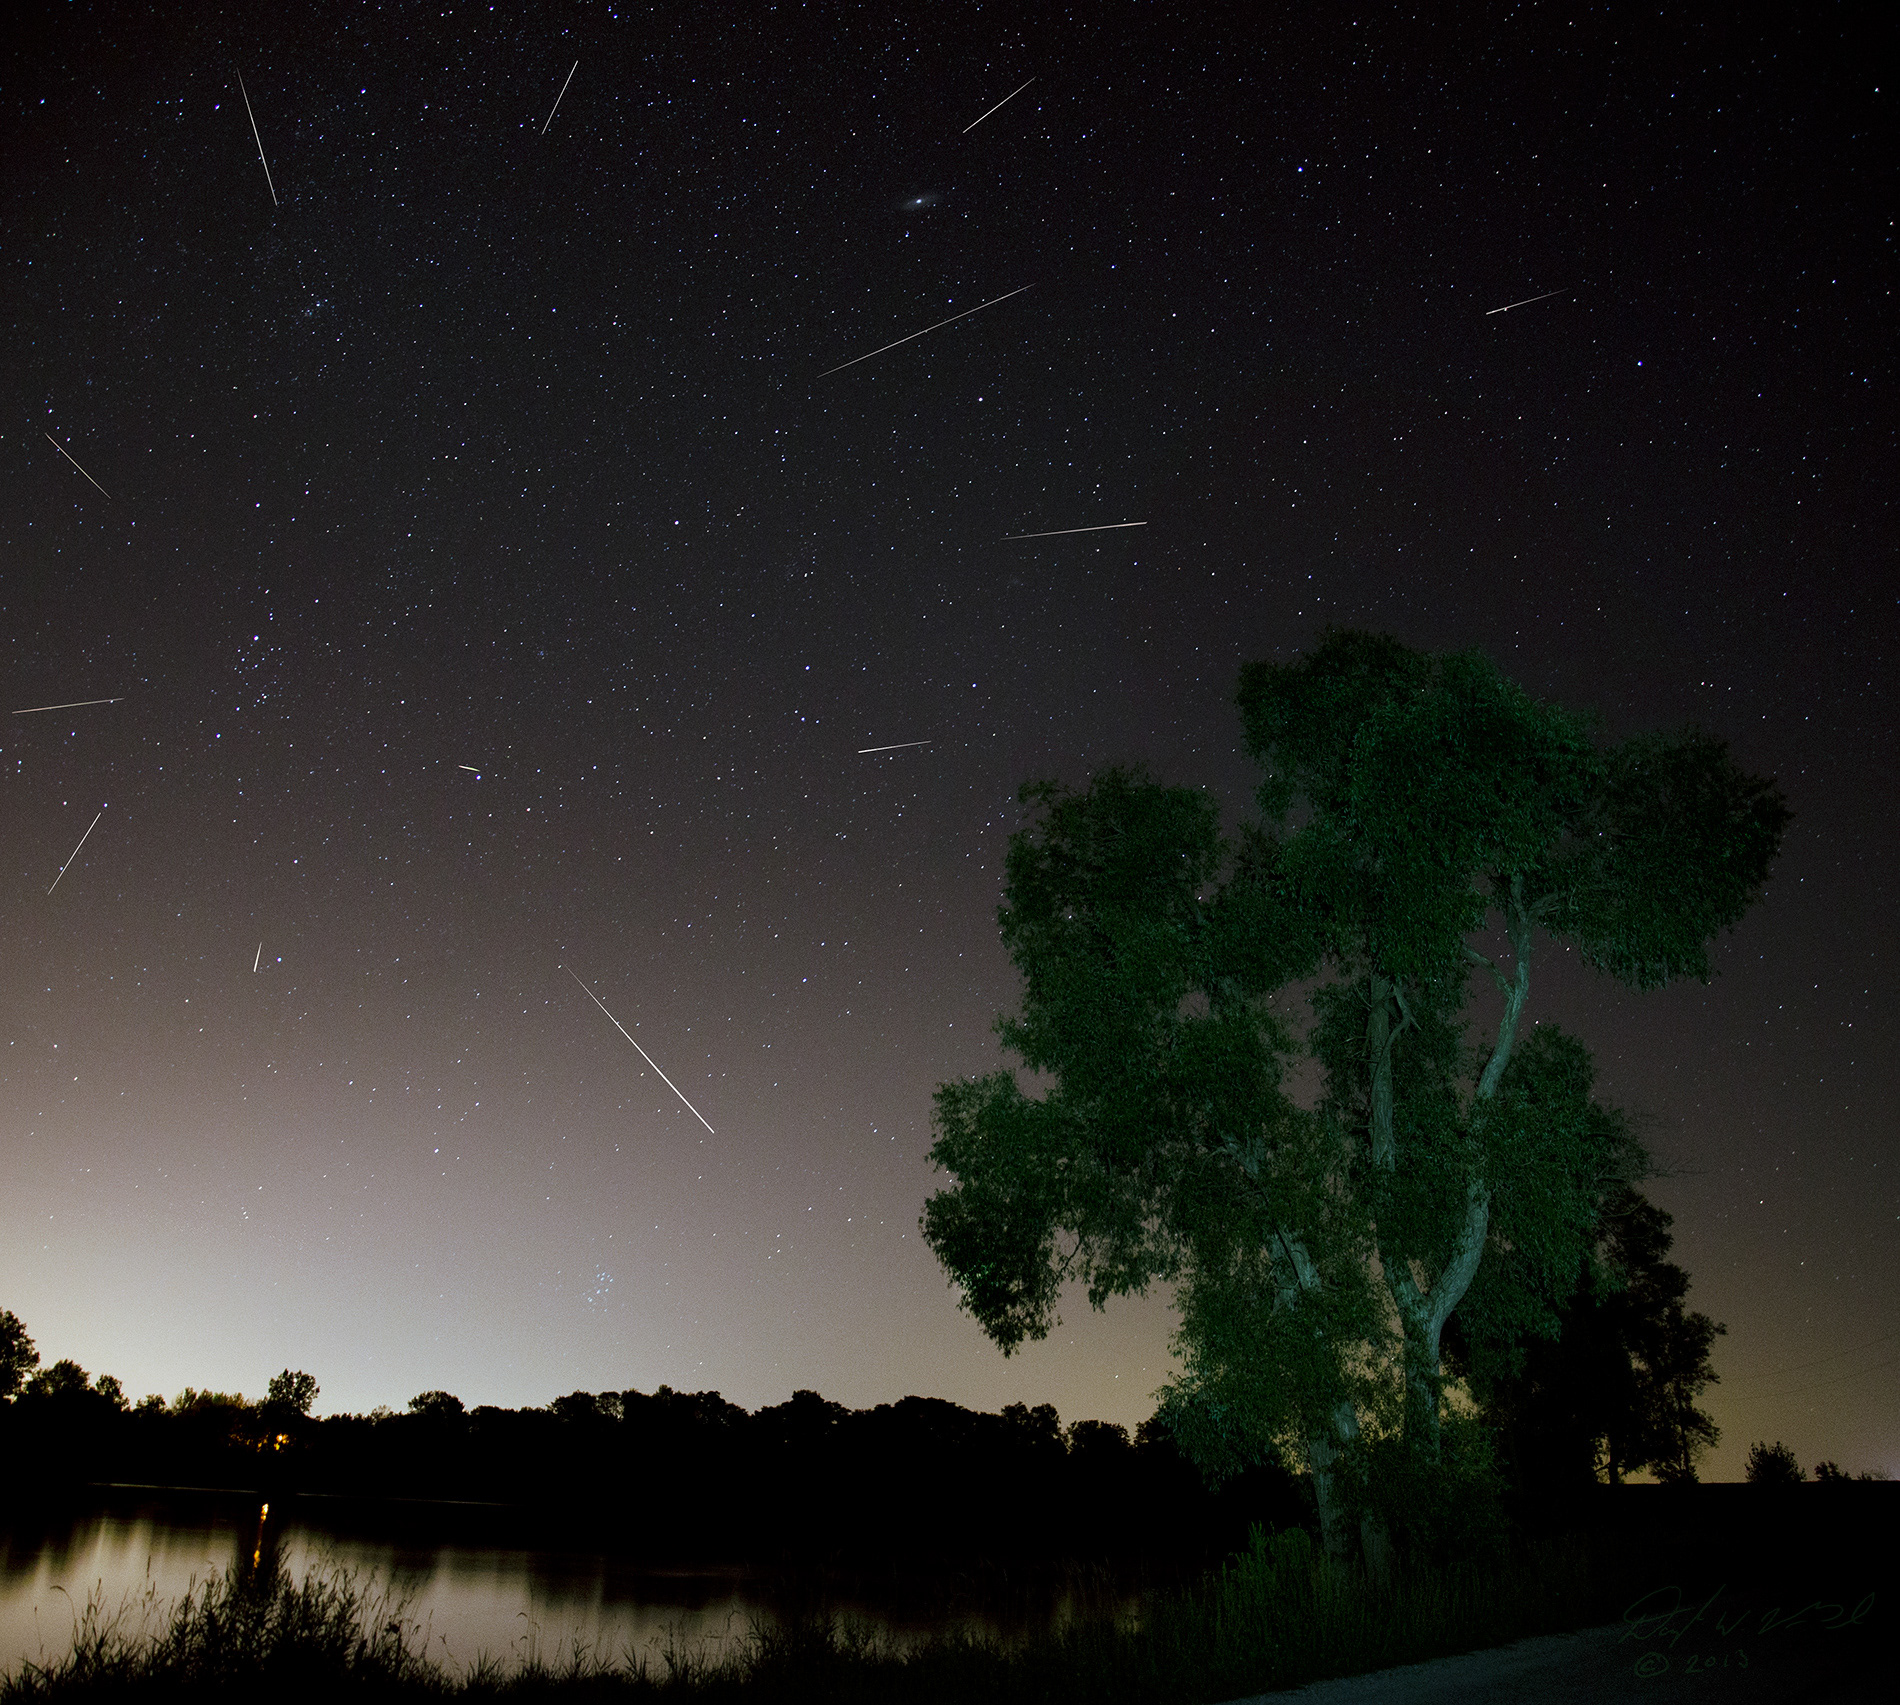
This image was the NASA Astronomy Picture of the Day
The NASA Post Can be Seen Here
This was instantly one of the favorite images in my collection. It was also the inspiration for this blog post.
Several people expressed an interest in how this photograph was made.
Nothing in this photograph is “made up”, it is however several images that have been blended together to produce a single image of the Orionid Meteor Shower.
This intent of this series of posts is to provide a sort of “walk through” on producing this image. In it I will discuss everything from equipment used, to planning the shot, to processing the final image.
By the end of the series, I hope to impart the knowledge and skills needed to produce images of your own, done in a similar style .
Photographic Equipment Required
Photographing meteor showers will give you a leniency that you do not get in regular landscape astrophotography.
In regular landscape astrophotography the main interest is quite often the milky way or other diffuse structures in the night sky.
Regular landscape astrophotography is made easier with cameras and lenses that are of optically higher quality. That’s not to say that you can’t capture a quality image with an older camera or a slower lens.
Having both does however make regular landscape astrophotography easier.
For shooting meteor showers a regular DSLR “kit” can achieve the results you’re looking for.
You will however require a sturdy tripod so as the camera does not move during your long exposures.
Other Useful Equipment
Throughout this post I will provide you with other things that I find helpful when planning or executing a meteor shower shot. My list will be a solid starting point. I will caution however that I still run into situations that I am not prepared for. My list should not be taken as the be all to end all list of equipment required. I'm sure you will find several things that I've forgotten.
First things first
Before we begin, I think it would be helpful to have a clear understanding of what a “shooting star” really is.
Before we begin, I think it would be helpful to have a clear understanding of what a “shooting star” really is.
Progressive Definition of Shooting Star
Quite often people are confused as to what exactly a shooting star is. I think it would be easier to explain by using a series of definitions and piecing it together.
All Shooting Stars start off as debris in our solar system. This debris is usually the size of a grain of sand, but can be larger. This debris is called a Meteoroid.
When a Meteoroid large enough travels through Earths atmosphere it creates an atmospheric ram pressure that heats the meteoroid and creates a glowing trail of glowing gases and melted particles of the meteoroid. This is when it is called a Meteor or “Shooting Star”
Every once in a while a Meteoroid / Shooting Star will reach the surface of Earth. It is at this point that a Meteoroid becomes a Meteorite .
Planning the Shot
The focus of this section will be planning your evening shot. We will cover the things you need to have a successful evening / morning of shooting.
In order to plan a good shot there are several things that you need to keep in mind. Some of these are equipment related, some are related to safety, and others are related to the skies.
I feel the best way to go about transferring my knowledge to you is to actually go through the series of steps that I take before going out shooting.
What is my subject
Like all styles of photography, knowing your subject equal in importance to getting the settings right on the camera. Knowing where and when in the night sky the meteors will radiate from is paramount. This will naturally lead to the other steps required.
The internet is an excellent place to start your search. There are several websites that devote a section to meteor showers and will often show images of where they radiate from.
On the off chance that you can not find an image of the radiant you can get a pretty good idea by looking for the constellation the shower is named for Perseids = Perseus, Leonids = Leo, Geminids = Gemini
Once you know the name of the constellation, you can set up your camera accordingly. Knowing the night sky is a definite plus but is not a 100% necessity. Many of today's smartphones have free applications that will help you find objects in the night sky.
Stellarium (http://www.stellarium.org/) is a great program for your home computer. The nice thing about stellarium is that it works on several different platforms.
Once you have figured out what part of the night sky the shooting stars will be visible in you can figure out your shooting location.
Shooting Location
Picking an appropriate shooting location is also very important. usually I know exactly where I will be placing my tripod several days prior to the actual event. Sometimes planning can even take place several weeks or even months prior to a shoot.
There are many, many things that you have to consider when picking a shot location. You should have a clear knowledge of the ground that you will be traveling on and shooting from. Navigation at night poses several dangers even if you have an intimate knowledge of the location. Uneven ground structure has been the cause of several sprains, strains or even breaks. Wild animals, insects and other such pitfalls should also be clearly understood before heading out.
Safety from other people should also be considered. You will be sitting in one location for several hours, often a photographer will doze, or even completely fall asleep. Obviously this would leave you potentially vulnerable to unfortunate events.
When picking a location, you should also keep in mind the direction that the stars will travel during the night. This is something else that Stellarium or other such programs can aid you with. When picking a foreground interest you will want to make sure that while the night moves on you will have a clear view of the sky where the meteors will radiate from.
It is a good idea to also make sure that the location you are shooting from does not produce too much light pollution to allow for long exposures. This can be determined by pre-scouting / pre-shooting. It would be a shame to waste the limited opportunity to photograph a meteor shower by picking a bad location.
I find it is always a good idea to travel with a fellow photographer or at least make someone aware of your location so they will know where to look for you if something unfortunate does occur.
Weather Conditions
First and foremost clear skies are required to be successful in your venture. Again here is where smartphones can help. There are several apps that will help forecast the night sky. Your local weather station, and also websites like http://cleardarksky.com can help you determine if shooting will likely be successful
Temperatures are also important to note. Temperature affects both you and your camera equipment.
We will start with the dangers to yourself.
Obviously or perhaps not so obvious is the dangers of cold to the human body.
Hypothermia is probably one of the biggest dangers from weather that I have faced.
Normal body temperature is about 98.6 F or 37 C. Hypothermia occurs as your body temperature gets below 95 F or 35 C. Once hypothermia sets in you require immediate medical attention. Failure to do so can eventually lead to a complete failure of your heart and respiratory system, which is obviously fatal.
Remember that it is far easier to remove clothing when you are too warm than it is to keep warm when not dressed properly.
When you are choosing your attire, remember that you will be mostly stationary for several hours which requires you to dress even warmer.
Temperature and Humidity can also have negative effects on your equipment.
The biggest danger that I've encountered is having my lenses fog up. This happens quite often when it's cold and humid.
One trick that can be used is to apply heat to the barrel of the lens. There are several methods that you can use to apply heat to your lens, the quickest and one of the least expensive methods is to use hand warmer packets.
To use these effectively simply use an elastic to hold it on the barrel of your lens. Use caution not to move the focus of your lens when using one of these hand warmers.
Now that we have talked about what you are shooting, where you are shooting it, and the weather conditions you need to be aware of we'll actually finish off by mentioning some other things you should keep in mind.
Another very important thing to keep in mind is the Moon Phase. When the moon is full you will have a very difficult time photographing meteors. You can still do it, but just like our sun is too bright to allow you to view the other stars in the sky, the reflection of that same sunlight off of the surface of the moon will illuminate the sky to such bright levels that all but the brightest meteors will be hidden from your eyes and the sensor of your camera. It is still worth trying to get the shot, just don't be disappointed if you don't come home with dozens of meteor images.
Just remember that there is always another meteor shower on it's way if you don't get it right this time around.
Camera Settings and Composition
The image at the top of this post was shot with a shutter duration of 20 seconds my aperture was set to f/4
The one setting that will be 90% consistent when you are photographing meteor showers, or any type of astrophotography for that matter, is the aperture that you use. You will want it to be "Wide open" or as close to wide open as you can while still getting good quality out of your lens. Some lenses are better than others so I won't delve into saying use f4 or f2.8 or f5.6. This setting will vary from lens to lens. I can tell you that the faster or wider you can keep it, the better. I usually set mine to fastest aperture that gives me an acceptable sharpness in the photograph.
As for the other settings, they will vary from shot to shot. Settings will also vary depending on the subject that you are shooting, the darkness of the surrounding sky, and the focal length of the lens.
One thing that I'll mention to you is to always take a few practice / test shots. It's not like you're wasting your time!!! In fact, not taking and examining practice shots will quickly lead to very wasteful nights.
It is at this time that I'll share what some might call a "Proprietary Secret". I really don't have much information that I won't share. I often feel that photographers that will not share have forgotten where they came from as most of us have learned from others or the internet, but alas, this is a subject to be discussed another time. The trick (or perhaps better called "Thing") that I do at this point is photograph my scene, without worrying about capturing any meteors. You can worry about the meteors once the scene is composed and captured. When photographing the main scene, you can even use a different ISO if needed. You may want to shoot the scene at a lower ISO to reduce noise and a higher ISO for the actual meteor shots to capture more meteors.
Once you have done that you can adjust your camera settings to allow for the maximum exposure without getting "eggs" for stars. This can be accomplished by following the "500" rule (which is explained in another post).
Now that your camera settings are set for shooting stars you can begin capturing shots that you can use for your composition. Meteors unfortunately are not totally predictable. You have no way of pressing the shutter at the "exact" moment that you need to, so I use an intervalometer to capture several photographs in a row. My camera has one that is built into it. If you don't have this very handy option on your camera you can purchase one relatively cheap. This will allow you to press the button once and walk away, or sit back and enjoy the show.
During the course of shooting you will find that the stars appear to be moving, this is due to the rotation of the earth..... fear not........ just move your camera as the stars move. You'll find it easier to keep the meteor "Radiant" in the center (or relatively close). When using an 15mm lens, I may move the camera 2 or 3 times during my shoot. During the blending of the images we will be placing them in the correct orientation for the final image.
You'll want to make sure that you're using a good sturdy tripod for these long exposures.
Obtaining Proper Focus
Proper focus is imperative to having a quality final image. Focus can be achieved a couple of different ways. If you have live view you can zoom in (live view zoom not lens zoom) on a star and focus on that point. Or, you can focus on something very far away during the daytime and leave the focus there. Always use manual focus auto focus will not work.
Once infinity is obtained through focusing, you can use a piece of tape to keep you from accidentally moving the focus ring.
Do not forget to take your camera out of auto focus.
Other things to consider
You will be out late at night (or early in the morning) so take the precautions, make sure people know where you are going to be. Dress warmly, pre-scout the location for potential hazards you may encounter in the dark. There are many things that can go wrong. Use your own judgement and experience to keep yourself safe. Perhaps even take a friend or spouse out with you to enjoy the evening together, you could always have some snacks and hot chocolate under the stars while your camera does all the work.
The darker the sky, the better, just like other types of astrophotography, the darker the skies, the more stars, and meteors that will show up in the image. Don't fret if you live in an area where dark skies are few and far between, you should be able to capture a few meteor images during a shoot.
Just remember to take a few test shots so that you don't overexpose the sky.
Post Processing
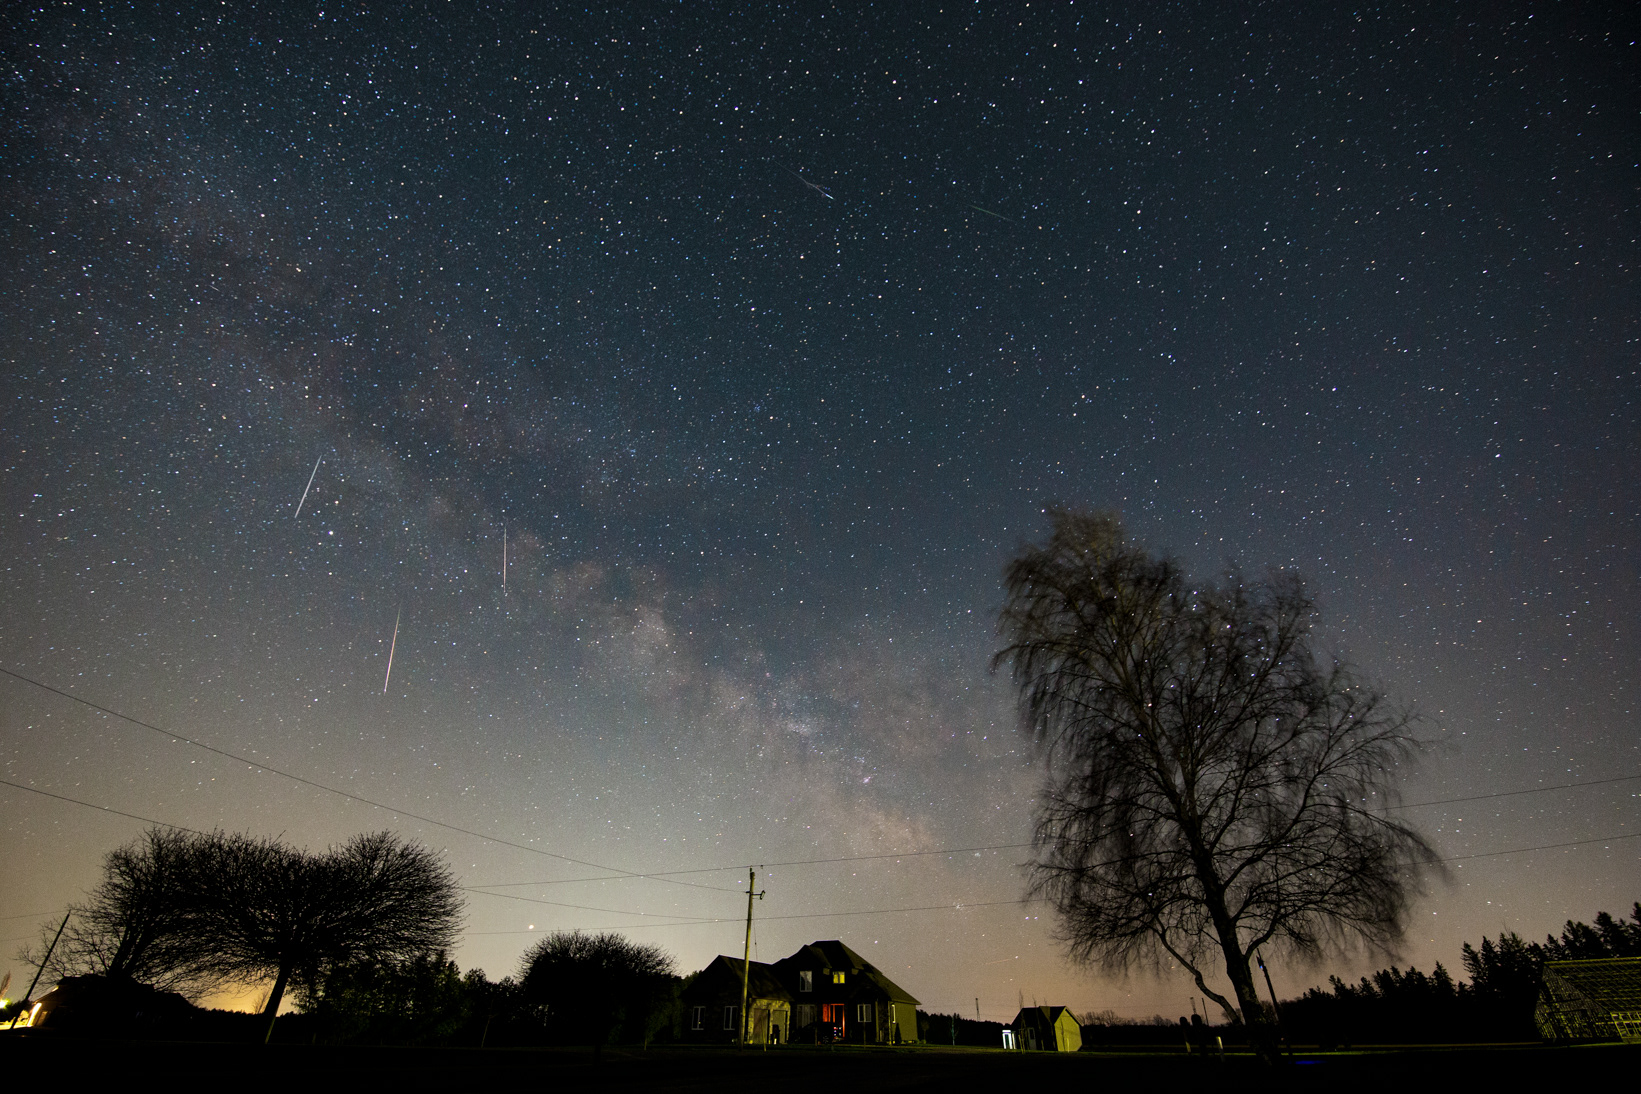
4 image composite, shot with Canon 6d and Tamron 15-30mm F/2.8 Di USD SP
Final image of the Leonids Meteor Shower
This is the portion of the series that most people have probably waited for. In this post I will be sharing my techniques used to create the composition of the Leonids Meteor Shower.
Hopefully you were lucky enough to capture some images of some relatively bright meteors. I personally always find this next part quite laborious. This is the time that you have to go through each and every image to look for meteor streaks. The Leonids image above had over 450 images that I went through. You are looking for the brighter meteor trails. You will also want to weed out the trails from aircraft and other unwanted trails.
I usually use a rating system to rank the images. This way I only select the better ones to work with. This will make things a bit easier for you.
First thing I blend is the background image (if you are using multiple images landscape). Most times you will use only one shot, but I have used 2 or 3 on occasion depending on the shot.
If you are using multiple images for the landscape, the first thing you need to do is align and blend the landscape image.
Once this is done you can import your "shooting star" images into Photoshop as layers
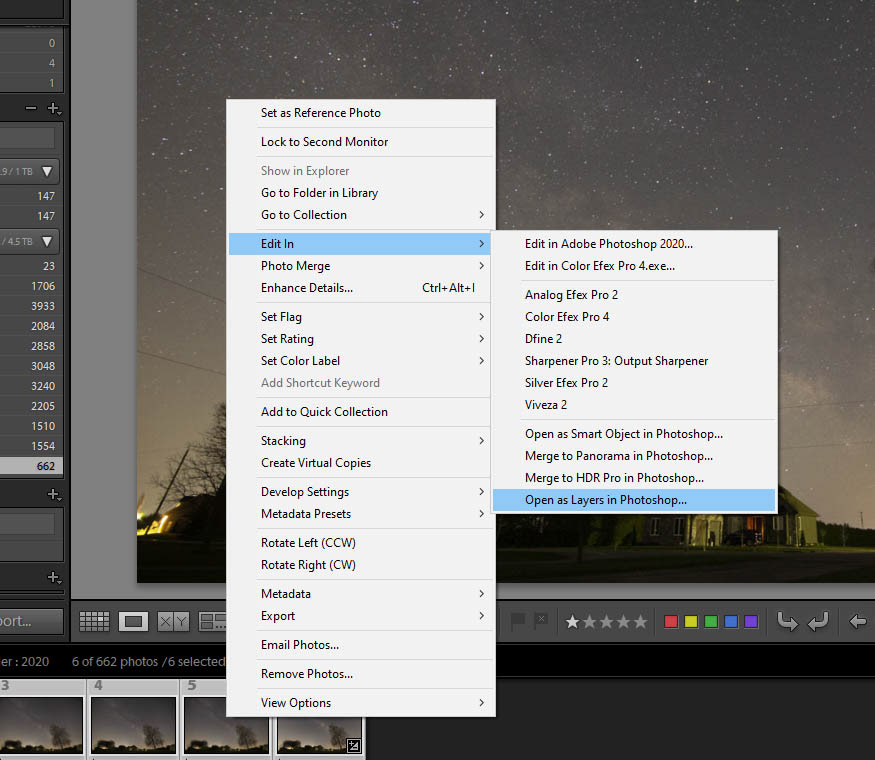
Open your images as Layers in Photoshop
First I align them in the image below as you can see I used "The Milky Way" to align the image. This allows for the meteors to be aligned in the proper orientation.
In order to align them I first make the backgound image visible and then one of my meteor images.
I generally set the opacity of the meteor image to about 50% so that I can see the background image to help align the meteor image properly. Using "Free Transform" I move and rotate the image until I am happy with the orientation (it will never be 100% perfect unless you are using an Equatorial mount).
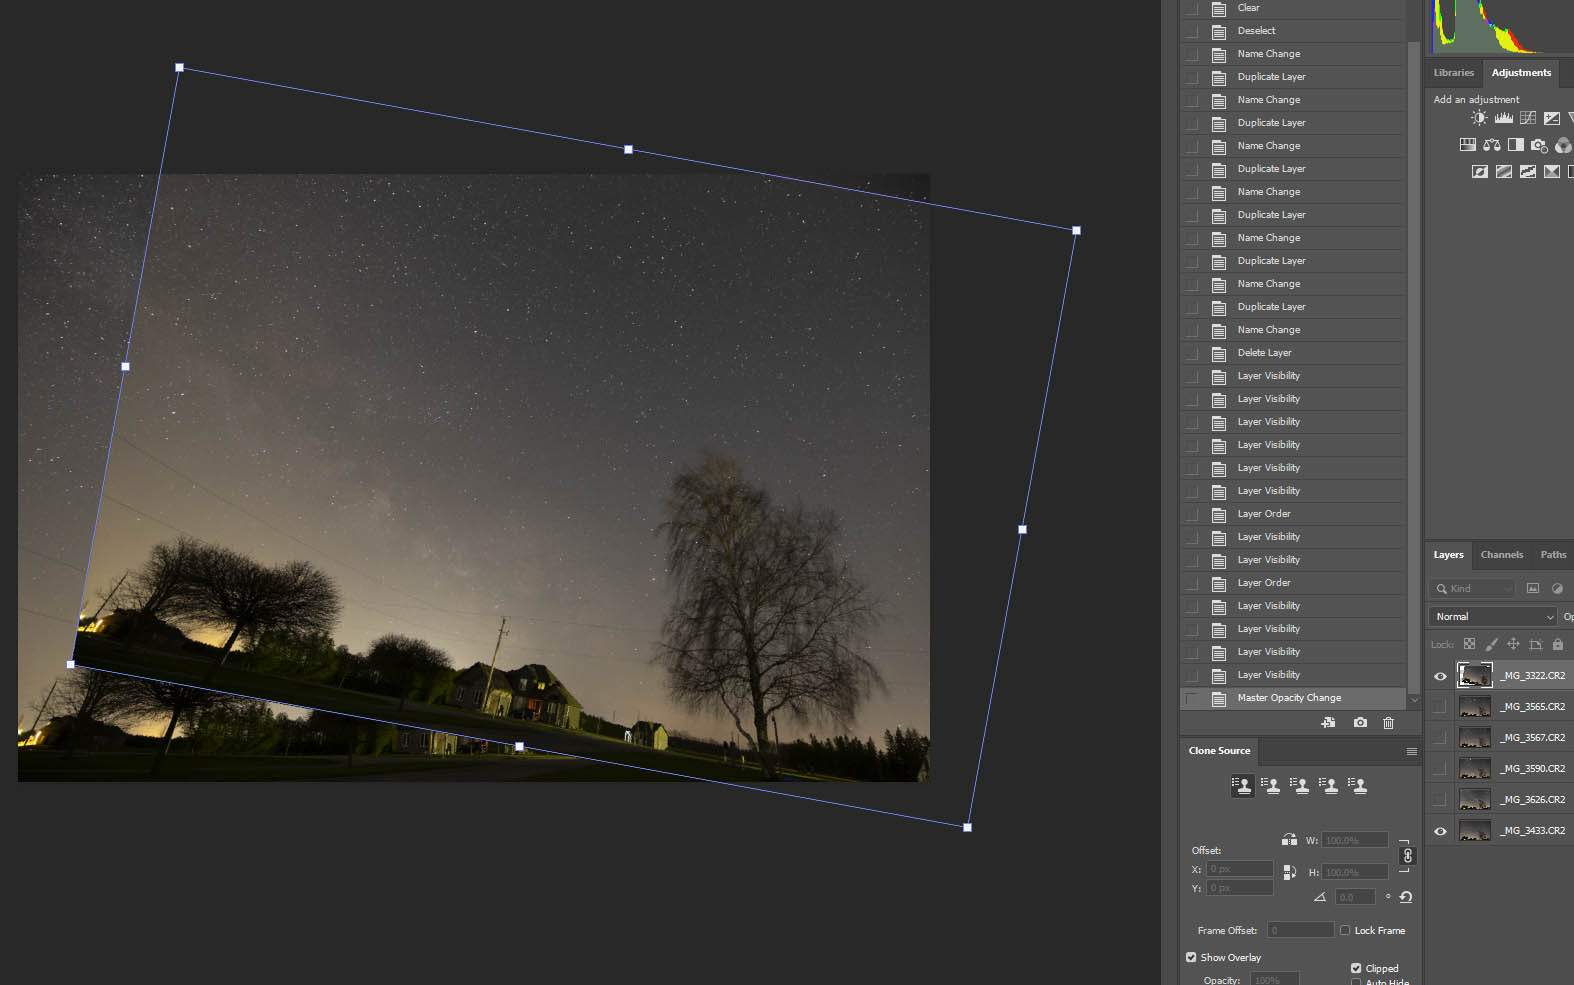
Once the alignment of the meteor layer is done I make it the only layer visible and set the opacity back to 100%.
Next using the "Polygon Lasso Tool" I carefully select only the meteor streak.
The next step is to copy it from the meteor layer and paste it in a new layer (on a PC I use "ctrl" + "c" to copy and "ctrl" + "v" to create the new layer and paste the meteor on it (the rest of the background on the new layer with just the meteor streak should be transparent.
Repeat this process for all of the meteor images that you wish to use.
Now you should have a single image (multiple layers) containing all of your meteor streaks and the background image.
At this point you can "Flatten" all of the layers and be happy with your image, or you can adjust each meteor layer to brighten them up a bit and bring out the colors in the streak.
Now you should have a single image (multiple layers) containing all of your meteor streaks and the background image.
At this point you can "Flatten" all of the layers and be happy with your image, or you can adjust each meteor layer to brighten them up a bit and bring out the colors in the streak.
If you do decide to adjust the meteor streaks make sure that you link each adjustment to the layer that contains the meteor streak that you are working on.
The method that you choose is totally up to you depending on your preferences.
There you have it. That is my "BIG" secret....... Not so big is it?
The method that you choose is totally up to you depending on your preferences.
There you have it. That is my "BIG" secret....... Not so big is it?
If there is anything else that you would like more information on drop me an message. I will get back to you as soon as possible.
Thanks for reading
Darryl
Thank you!